This time I have come up with a DIY dustcovers project. It is special and unique project for me not only because its going to be my first DIY project (On this blog obviously) but also because it’s a 3-in-1 DIY project:
- Making dust covers for my handbags.
- It gives a unique idea of vertical space utilization and handbags arrangement.
- Making of a photo wall gallery.
For a long time I have been struggling to fix a proper place to keep my handbags because of less space. Lately, a unique idea popped up into my mind and I decided to make dustbags for each handbag of mine and to hang it in a little obsolete corner of my room.
DIY DUST COVERS TUTORIAL :
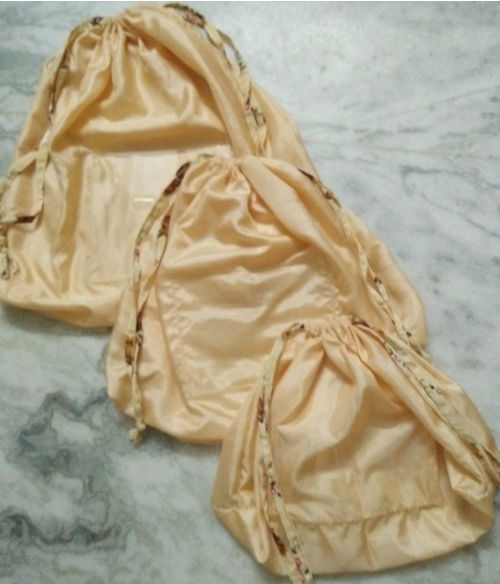
- I have made 7 dustbags of three standard sizes for large, medium and small-sized bags.
- I have used a bright and light coloured satin fabric for all the dust covers, so that they look good when hung in the room and give an illusion of broader and well-lit space.
- Used a printed satin cloth to make strings to break the monotonous look.
Accessories needed apart from the cloth are:
- matching thread
- sewing machine
- scissors
- chalk/marker
- measuring tape
- Transparent flint sheet
- Metal hook rack
Step by step tutorial:
- To work out how much fabric you need, Fold the fabric in half with the right
sides facing each other. The fold will be the bottom of your dustbag. Place the handbag on the folded cloth. Then add 4 inches onto the height and 2 inches at both sides of the bag. This way the handbag can comfortably be put inside the cover.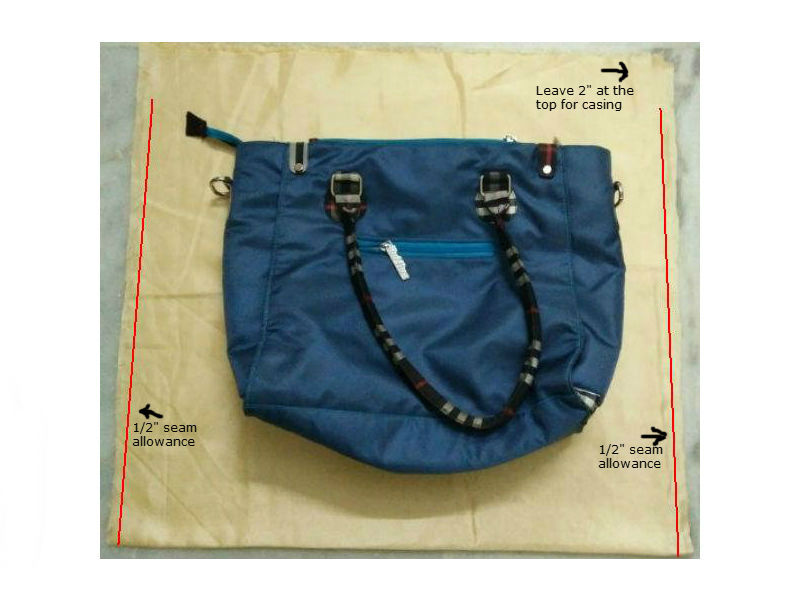
- Mark the sides for hemming leaving 1/2 inch seam allowance.
- the top 2 inches at the four open sides should be separately stitched to stop the fabric from fraying away while making the casing for inserting cords. Turn the top edges of the side seams inward and refold it.(Maximum 0.5 inches). then stitch it. Similarly stitch the other three top side seams.

- Now starting from the bottom, stitch the sides along the marking. Stop 2 inches before the top ,exactly the point from where separate stitching of sides has started. Lock the stitch with back-stitch.
- Now for the drawstring casing, fold over the top opening around 0.5 inches. Refold the fabric over again and line it up with the top of your side-seam. Pin it to hold. You can iron it instead.
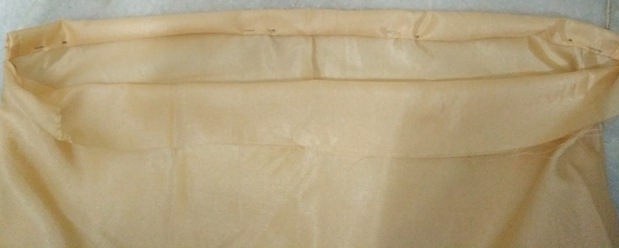
- Now sew the channel.
- Repeat the same process as no. 5 and 6 on the other top part of the cover.
- If you want to give your dust cover an extra depth to hold fat handbags, then box the two corners of the bottom of your cover.
- Pull the fabric at one of the corners of the bag so that the side seam and the bottom fold line of the bag are on top of each other making a triangle shape.
- Align the seams with pin. Measure appox.3-3.5 inches from the vertex and mark a line perpendicular to the seam.

- Sew along the lines multiple times for strength.
- Turn the bag right side out.
- Now for making the strings, I have cut strips of the printed satin fabric. 2 strips each of 2 inches wide and 30 inches long for 1 dustbag.

- fold raw edges (lengthwise) in towards the centre and refold the string into half.
- Iron it and then stitch along the open edge. Your string is made.
- Attach the front part of your string to a safety-pin. Insert and move it through one of the channels(let’s name it A) and then through the channel at other side(name it B)making a 360 degrees turn.
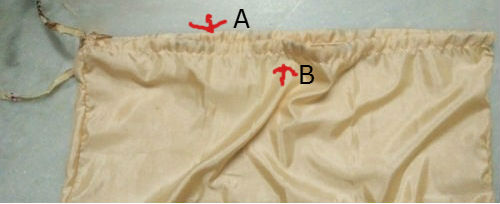
- Now insert the second string from the opposite side of channel A and move it through it and through channel B emerging from the opposite side of channel B, making a 360 degree turn as well.
- knot the ends.
- Your drawstring bag is complete.
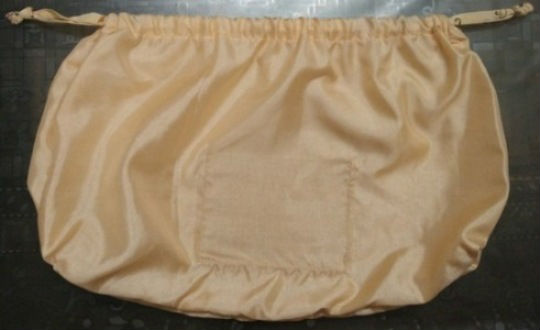
- I put in each of my handbags in the appropriate dustcover.
Also read some interesting articles :
PERSONALISED PHOTO WALL
Next, I started working on the wall where I had decided to hang these bags. I have an 18 inches wide unused corner in my room just behind the door.
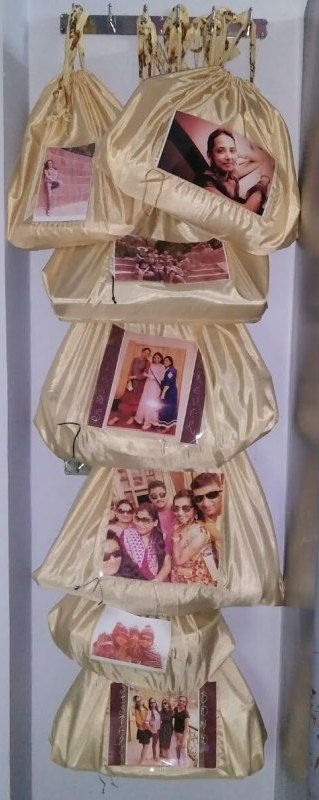
I bought two metal hook racks of 14 inches width each and drilled them as shown in the picture.
Hung all the dustcovers one below the other . It looked great and neat as well, still the personalised effect was missing.


Thus came the super idea of making a personalised photo wall gallery.
- I took a flint sheet (a transparent and stiff plastic material) to be stitched at the
central part of any one side of each dustcover. - Depending on the size of the bags and also the size of the photographs I wanted to put inside, I cut the flint sheets into different rectangular sizes.
- Stitched three sides of the sheets onto the bags, leaving the top edge to insert the photograph.
- Selected seven of my most favourite photographs and put each inside the plastic pockets.
- The adorable personalised dustcovers were ready to be hung.
THE FINAL LOOK :
After arranging my photo covers on the hook rack, The final look came out just superb. The part of the room which was not used has now turned into an eye-catching gallery wall. Well, the corner of the room has become the centre of attraction. Most importantly, I have got so much of space now in my almirah for more clothes.
P.S. To find out which of my handbags lie in which of the dust covers, I sewed a matching colour thread of the hand bag to one edge of the plastic pocket. You can also use different coloured strings in the channel instead of printed strings made of cloth.
Artistically inclined,
PRIYANKA
Source : Also published in Women’s Web
Also read some interesting articles :